外部 DOM 修改
¥External DOM Mutations
有时需要与第三方库合作,这些第三方库希望能够自由地改变 DOM、在其中保留状态,或者根本没有组件边界。有许多很棒的 UI 工具包或可重用元素都是以这种方式操作的。
¥Sometimes there is a need to work with third-party libraries that expect to be able to freely mutate the DOM, persist state within it, or that have no component boundaries at all. There are many great UI toolkits or re-usable elements that operate this way.
在 Preact 中(在 React 中也类似),使用这些类型的库需要告诉虚拟 DOM 渲染/比较算法,它不应该尝试撤消在给定组件(或其代表的 DOM 元素)内执行的任何外部 DOM 突变 )。
¥In Preact (and similarly in React), working with these types of libraries requires that you tell the Virtual DOM rendering/diffing algorithm that it shouldn't try to undo any external DOM mutations performed within a given Component (or the DOM element it represents).
技术
¥Technique
这可以像在组件上定义 shouldComponentUpdate() 方法并让它返回 false 一样简单:
¥This can be as simple as defining a shouldComponentUpdate() method on your component, and having it return false:
class Block extends Component {
  shouldComponentUpdate() {
    return false;
  }
}
...或速记:
¥... or for shorthand:
class Block extends Component {
  shouldComponentUpdate = () => false;
}
有了这个生命周期钩子,并告诉 Preact 在 VDOM 树上发生更改时不要重新渲染组件,你的组件现在拥有对其根 DOM 元素的引用,该引用可以被视为静态,直到组件被卸载。与任何组件一样,该引用简称为 this.base,并且对应于从 render() 返回的根 JSX 元素。
¥With this lifecycle hook in place and telling Preact not to re-render the Component when changes occur up the VDOM tree, your Component now has a reference to its root DOM element that can be treated as static until the Component is unmounted. As with any component that reference is simply called this.base, and corresponds to the root JSX Element that was returned from render().
演练示例
¥Example Walk-Through
下面是 "关闭" 组件重新渲染的示例。请注意,render() 仍然作为创建和安装组件的一部分被调用,以生成其初始 DOM 结构。
¥Here is an example of "turning off" re-rendering for a Component. Note that render() is still invoked as part of creating and mounting the Component, in order to generate its initial DOM structure.
class Example extends Component {
shouldComponentUpdate() {
// do not re-render via diff:
return false;
}
componentWillReceiveProps(nextProps) {
// you can do something with incoming props here if you need
}
componentDidMount() {
// now mounted, can freely modify the DOM:
let thing = document.createElement('maybe-a-custom-element');
this.base.appendChild(thing);
}
componentWillUnmount() {
// component is about to be removed from the DOM, perform any cleanup.
}
render() {
return <div class="example" />;
}
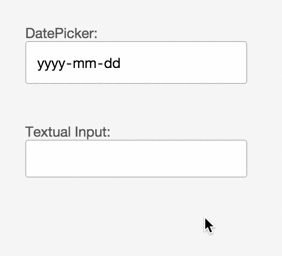
}示范
¥Demonstration
现实世界的例子
¥Real-World Examples
或者,请参阅 preact-token-input 中此技术的实际应用 - 它使用组件作为 DOM 中的立足点,但随后禁用更新并让 tags-input 接管。一个更复杂的示例是 preact-richtextarea,它使用此技术来避免重新渲染可编辑的 <iframe>。
¥Alternatively, see this technique in action in preact-token-input - it uses a component as a foothold in the DOM, but then disables updates and lets tags-input take over from there. A more complex example would be preact-richtextarea, which uses this technique to avoid re-rendering an editable <iframe>.